

Image overlays
The Image tool drops your own pictures onto a World Map scene — an inset crest, a compass rose, a drifting fleet, a torn-parchment corner. Each image is yours to move, resize, layer, and animate.
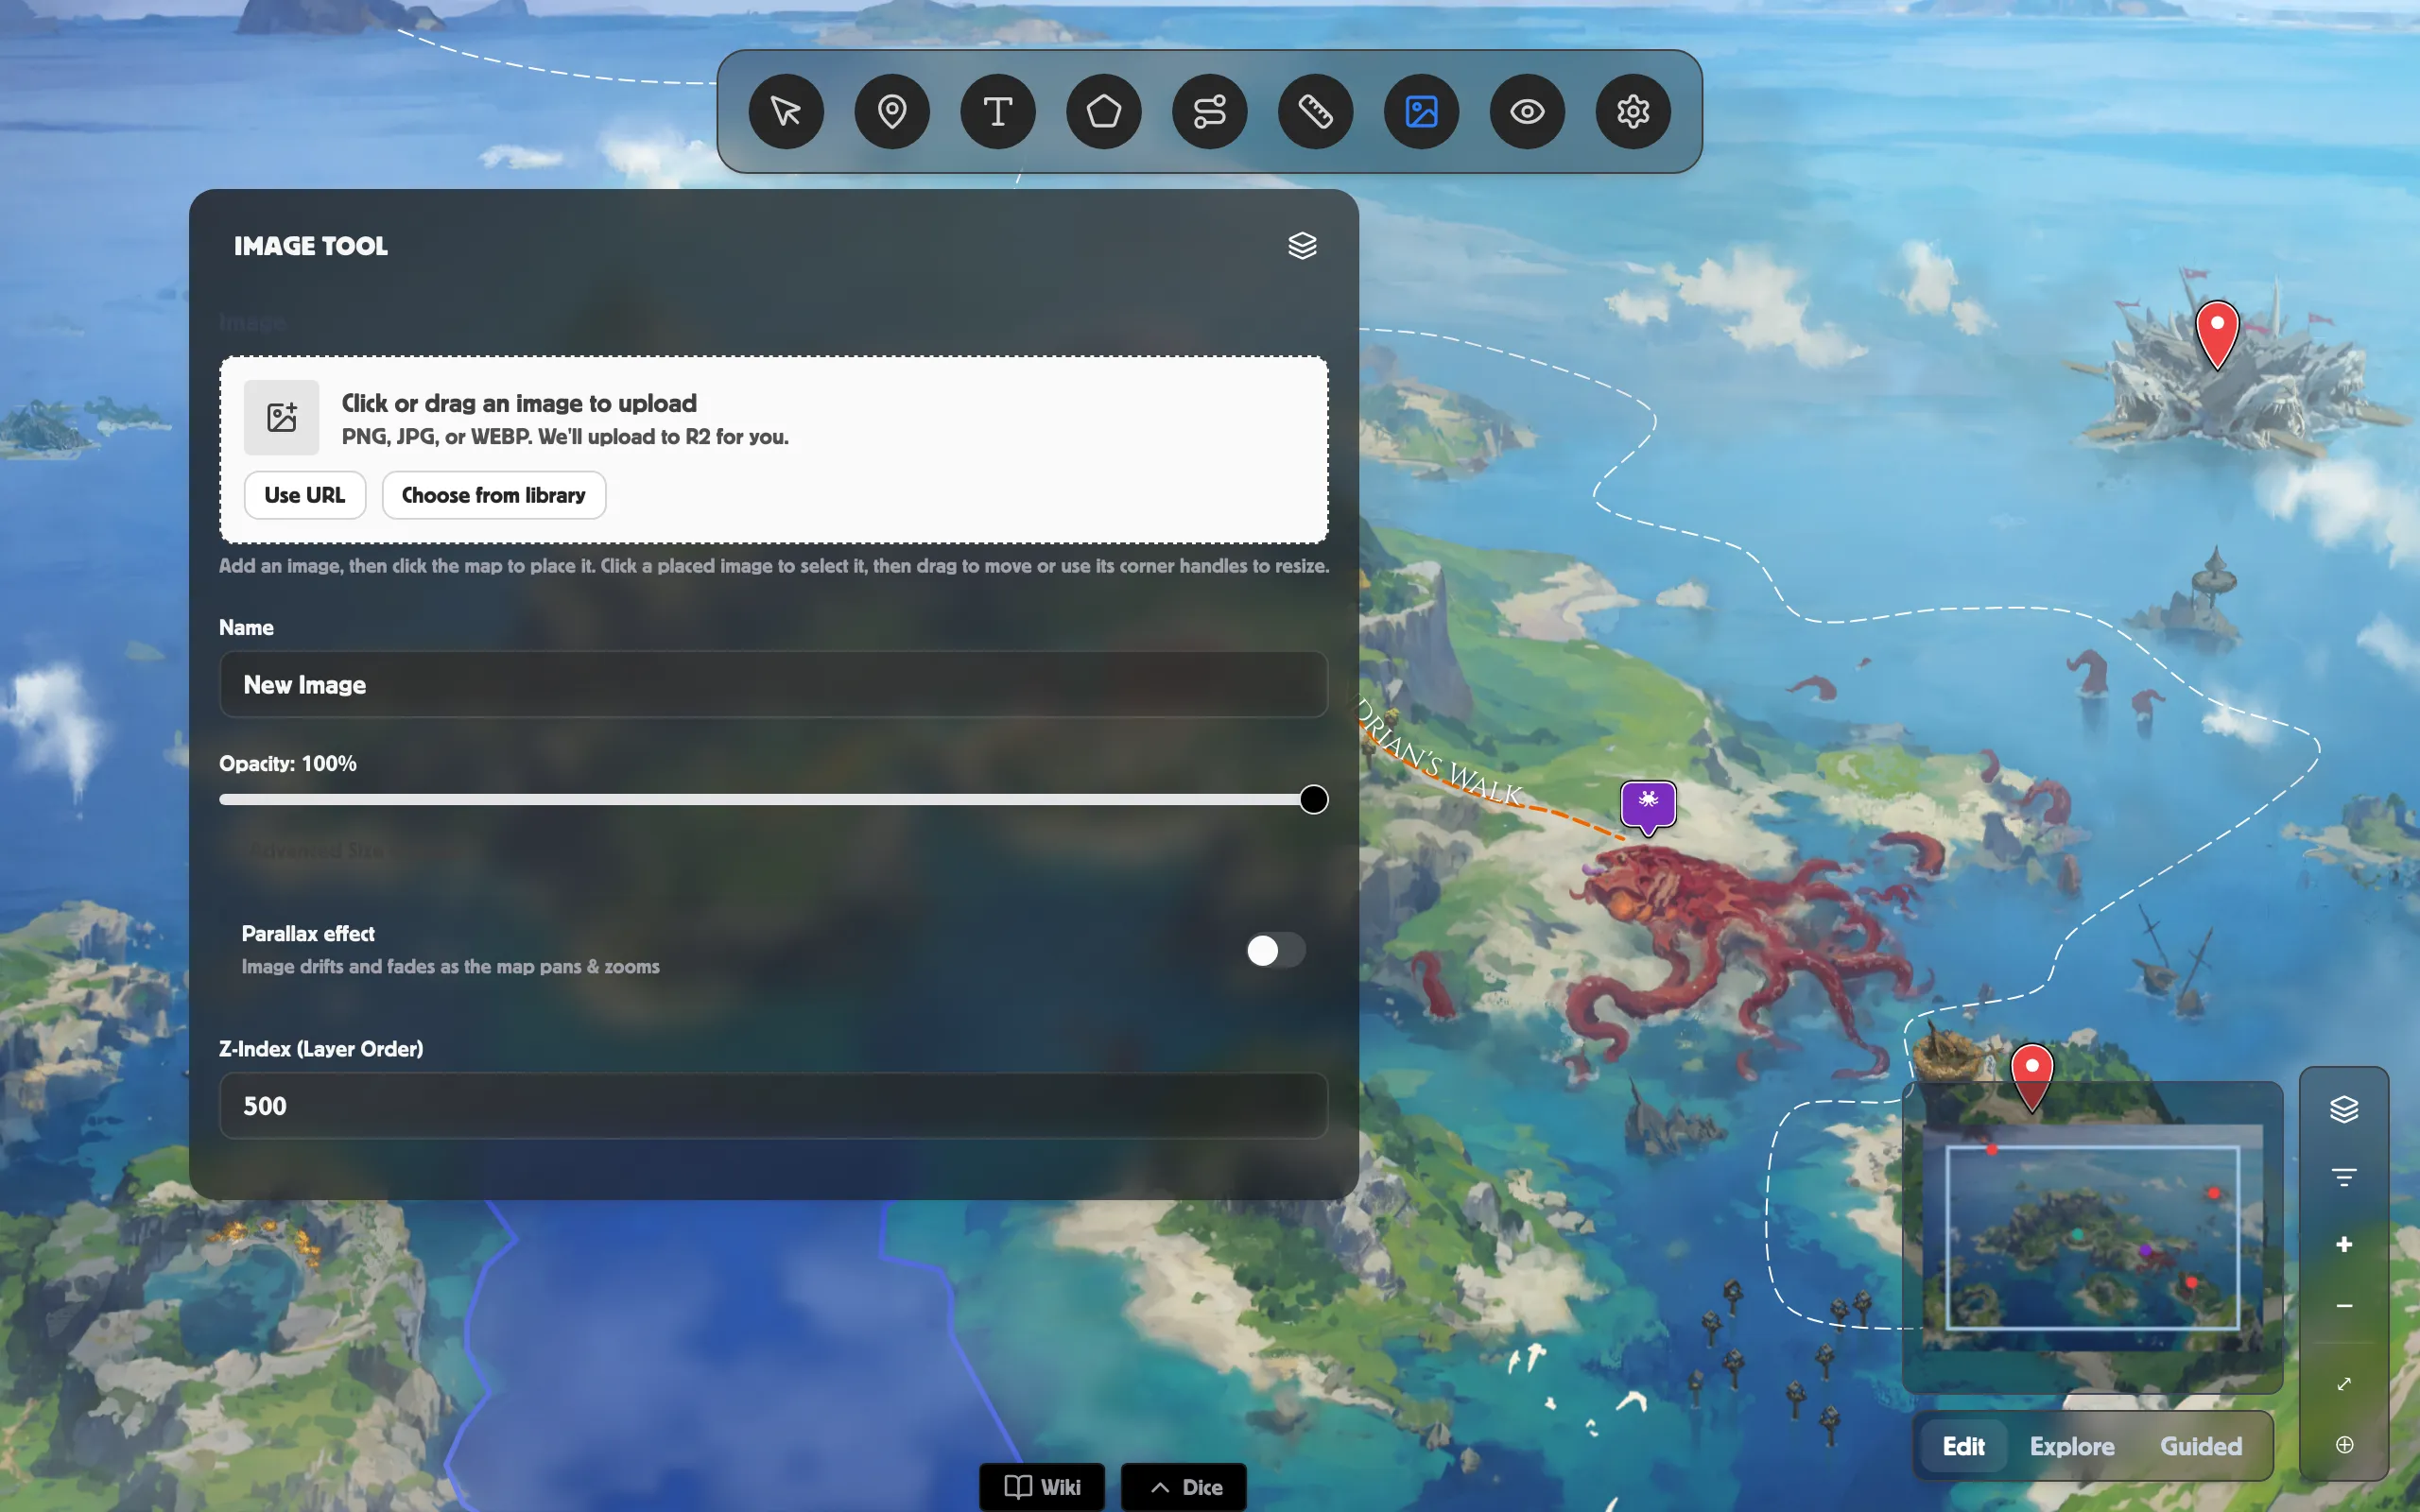
Place an image
Section titled “Place an image”-
Pick the Image tool from the toolbar to open the Image tool panel.
-
Use the Image uploader to add a picture.
-
Click the map where you want it to appear.
-
Click the placed image to select it, then drag to move it or use its corner handles to resize.
Give it a Name so you can find it later. To remove one, select it and click Delete Image.
Size, fade, and layering
Section titled “Size, fade, and layering”- Opacity — fade the image to sit gently over the map.
- Advanced Size Options — open this for exact Width and Height if you don’t want to drag the handles.
- Z-Index (Layer Order) — a higher number sits above other images and features; a lower one tucks behind them.
Add a parallax drift
Section titled “Add a parallax drift”Turn on Parallax effect and the image drifts and fades as the map pans and zooms, giving a sense of depth — perfect for clouds or distant ships.
The Parallax Factor sets how much it moves: 0 = Stationary (it holds its place as the map slides beneath it) and 1 = Moves with map (it travels exactly with the terrain).
Attach pins to an image
Section titled “Attach pins to an image”Want a marker to travel with an image — a name tag on a moving ship, say? In the Pin tool, open Attach to Image on the pin and choose the image by name. From then on, dragging that image carries its attached pins along with it. Set it back to None to unhook the pin.
Related
Section titled “Related”- Pins — the markers you can attach to an image.
- Basemaps — the map beneath your overlays.
- Atmospherics — drifting weather across the whole map.
- World maps — everything you can add to an overland map.